Tuesday, November 8, 2011

Long Time, No See

I've been AWOL for a while, but not without good reason: on September 3rd I became a father!


Virginia is over 2 months old now and the new "normal" is starting to settle in.  All is well in our household.

I've been out in the garage some too, thanks to the generosity of my wife.  I finished a little companion side table in the same style as the coffee table:


If you're interested in the construction techniques, just read the last few posts and add a mortised shelf into the legs...it was basically the same thing with different dimensions.  I did have a little help tapering the legs though:


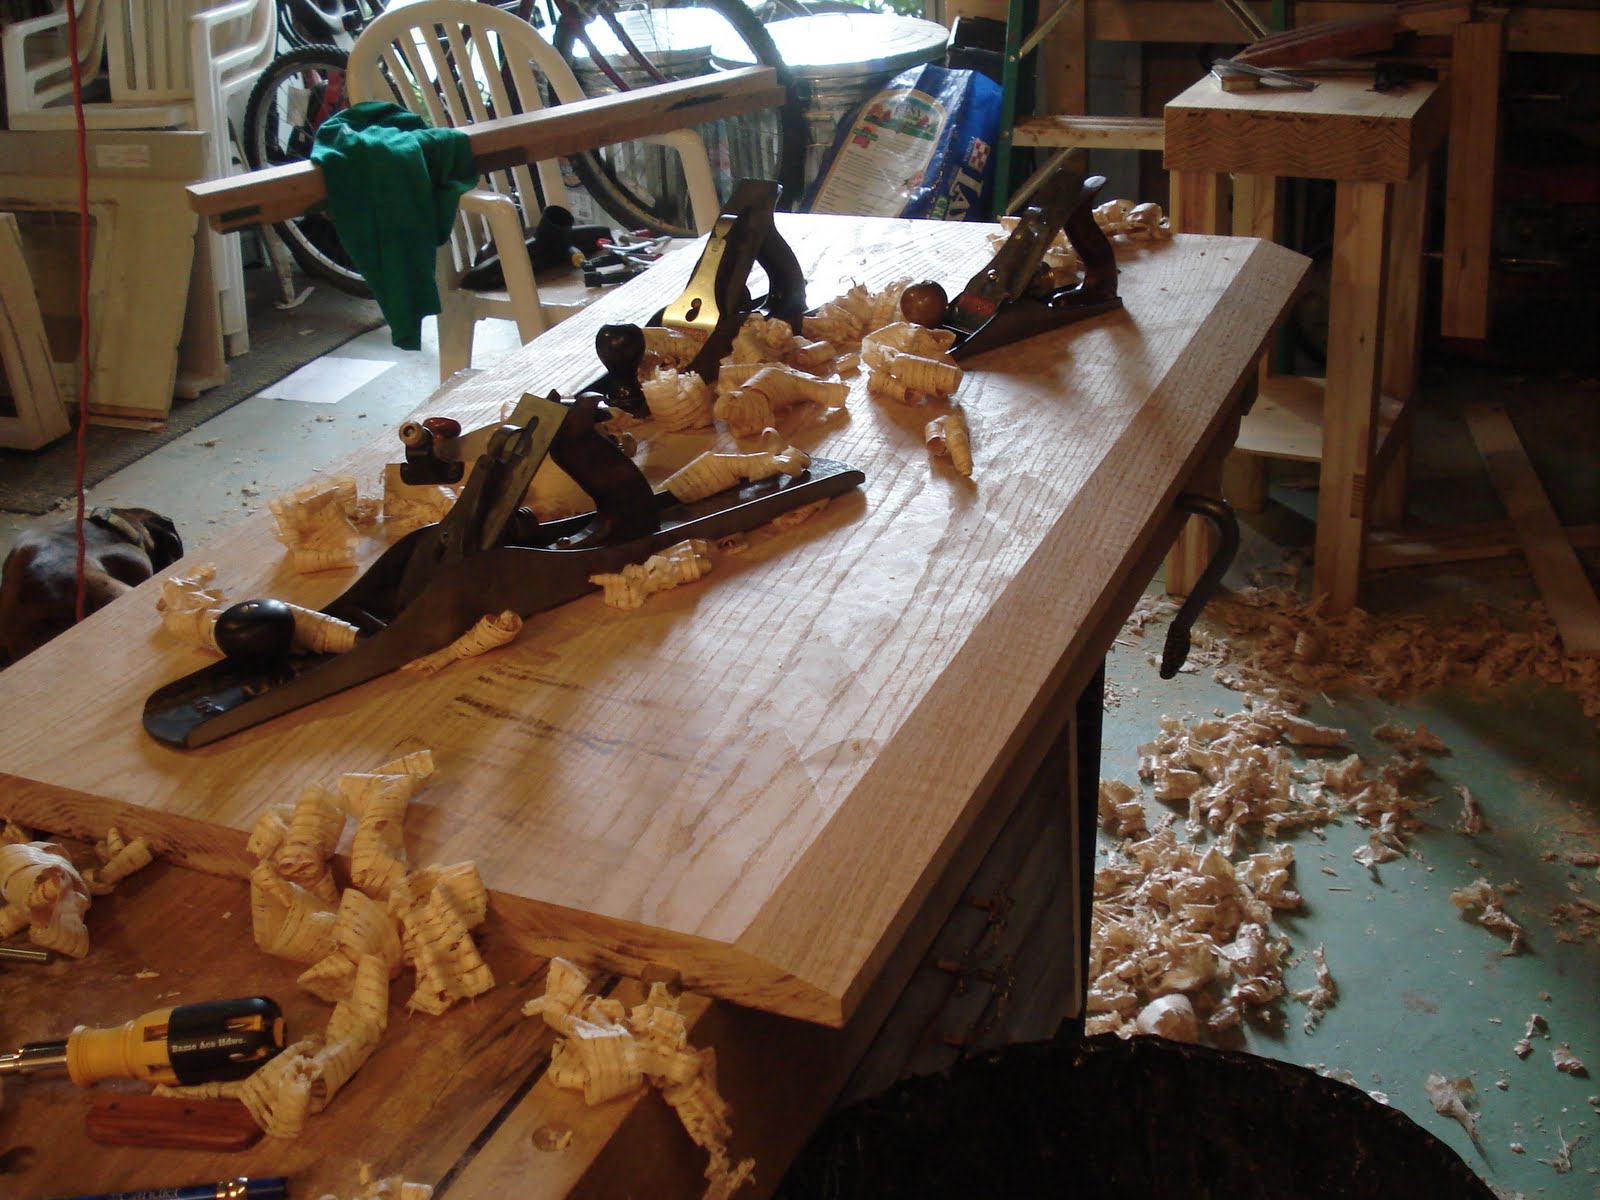
I've been acquiring a few additional tools recently and I'm starting to run out of storage space for them.  Various current storage solution integrated into my bench have served me well for the past year, but now I have more saws than can fit on the end, more hand planes than I have hangers for, and more chisels than can fit in the little area on the bench corner...truly, woe is me.  I also got a sweet Lie-Nielsen router for my birthday and it's just been floating around the garage, pitifully homeless.  This is no way to live.

Serendipitously enough, The Anarchist's Tool Chest, by Chris Schwarz is sweeping the nation, offering relief for those with just this problem.  ATC offers sage advice for assembling a functional set of hand tools and ends with a design for a chest in which to hold them.  My wife (did I mention she is generous) got me a copy for my birthday...

..and so it begins.

Here's Chris's (unpainted):
http://lostartpress.wordpress.com/2010/12/12/men-of-the-earth/
Pretty sweet.

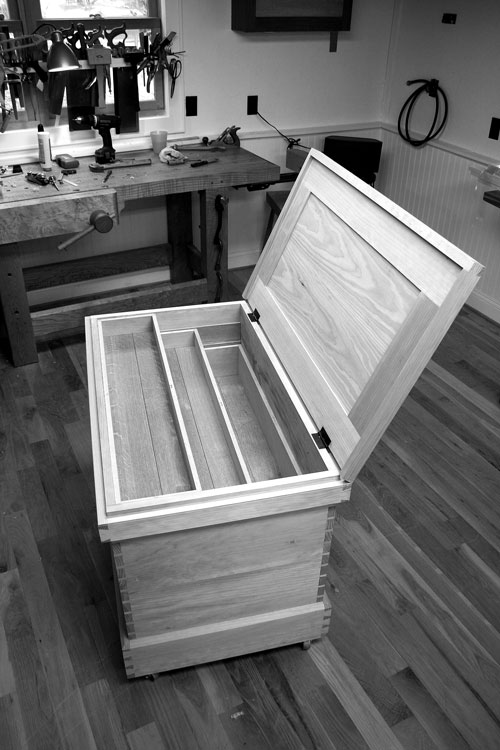
I'm making mine primarily out of cypress, it's local, light, water-/rot-resistant, relatively inexpensive, and just about the easiest wood in the world to work.  Tonight I finally finished dovetailing the body.  The two long faces are the tail boards and I cut them together:


I've been wanting a beefier rip backsaw than my little Gramercy dovetail saw for some time now.  If money wasn't an issue I'd be on the waiting list for this guy, brass-backed, open mesquite handle, please.  But money is a factor, so I pulled the trigger on one of the undisputed best values in woodworking, a Veritas backsaw.  I was torn between the standard dovetail and the carcass and went with the carcass (band name, anyone?) saw in the end (bought in the presence of Frank Klausz at Highland's Fall shindig).

I like it.  It cuts fast and straight; what else could you ask for in a saw?  Good looks?  Well yeah, there's that issue...oh well.

Lots of sawing and chopping later:


It never gets old.  There are some subtleties here that aren't immediately obvious.  The tail board (top) is two boards glued together while the pin board is three.  Their seams don't line up: this ensures that even if the glue were to fail, the frame would still be held together by the dovetail joint.  If their seams lined up there would be a chance that the whole chest could separate in two (a top and a bottom) if it were lifted by its top.  Also, on the tail board, the seams terminate in the tails, not the tail sockets; on the pin board, the seams terminate in the pins, not the pin sockets.  This is so that the joint is actually clamping those seams tighter, not trying to open them up.

Bottom line: it'll hold.

I made a simple caul for the glue-up to ensure that the tails seat fully into their sockets.


I've marked the material that I want to leave with a Sharpie.  Then I cut a little saw kerf and chiseled away the waste in between the marked areas.


Now I can exert all the clamping force where it needs to be: on the tails.

So that's where I am now, my first corner is drying right now.  I'm using Titebond Liquid Hide Glue on this project which is great for these massive joints because of its long working time; however its long set time will slow a project down a little bit.  For those of you who were wondering, they don't call it "hide" glue because it's hard to see.  Look it up.

That's all for now, I'll write again when I reach another good stopping point and time permits.

Sunday, August 28, 2011

Coffee Table, Part 2

Last time I finished up the apron and drawer assembly and putting the taper on the four legs of the new coffee table.  Now that the apron was finished, I could fit the legs to each corner.  This involved sizing the thickness of the sides of the apron and transferring the measurement to the legs, then removing that with the big saw:

Then came the fun part: working the tabletop.  I started with the aforementioned big ole' slab of oak...

...and cut it in two...

...jointed the adjacent edges and glued them together:

Then I just used the circular saw to cut the length and width that I needed:

A lot of planing later, the top was smooth, flat, and showed a fair amount of figuring in places:

Jointing the edges of a slab this big is a little more difficult that most pieces.  Planes are meant to be used at belt height which wasn't really doable here:

I then started putting the bevel around the underside; here's one edge complete:

The process starts by using an angled fence on the skew block plane to establish the angle of the bevel.

The jointer and fore plane then taken that bevel even further down...

...which provides a good foundation for the scrub plane to come in and hog out lots of stock.

I then come back with the jointer and then the smoothing plane to finish the edge.

I couldn't wait to see what the stained top would look like, so I went ahead and put on a coat or two.
It became obvious that the surface wasn't quite smooth enough yet.  If you look closely at the above photo you can see plane tracks running across the top.

Only one thing to do...
...plane it down and start over.  The next time I finished it off with a cabinet scraper and it worked out well.

Next I made the brackets that hold the top to the apron.  This just involved planing a rebate into a piece of wood...
...cutting that wood into little blocks...
...and installing them in the groove running around the inside of the apron.  Screws driven through these blocks and into the bottom of the tabletop hold everything together firmly but still allow for seasonal wood movement.  Here you can also see how the legs are attached...glue is involved too.

The oak is stained with Minwax "Chestnut Red" and the tabletop has some polyurethane on it.  The maple is rubbed with Watco Danish Oil in "Golden Oak."

In situ:

With the installed drawer pull.
Really ties the room together, does it not?  Or could that just be the rug?

Tuesday, August 16, 2011

Brief Intermission

I'd just like to take this space to say to things:

1. Greetings to the Slovenian readers of this blog!  I got 12 hits from you guys recently.  Also 17 from Serbia and 19 from Bulgaria.

2. John Kohler, author of madbrainbasics.blogspot.com, has not posted in 4 months.  John, you should be ashamed of yourself.  I was enjoying your blog and then you quit after 4 posts.  What gives?

That is all.

Coffee Table, Part 1

I've really lost my flair for clever blog titles haven't I?

This past weekend I got to work on the coffee table.  Here's the SketchUp concept:


Legs were the first order of business.  The two inside faces of each leg taper to half their upper dimension.  My approach was to shape the first taper on all of them at once, and then do the second taper one at a time.

The first step was to cut the blank.  This piece of oak was wide enough to provide all four legs, with some left over for the kerf needed to separate them:

Then I laid out one taper:

Next I started bringing the taper down with my scrub plane.  This plane gets worked across the grain and removes a lot of stock fast:

I just kept working it down, checking my progress often:

Then just cleaned it up with the joiner down to the final taper:
Gotta love planing "downhill," it leaves such a nice polished finish on the wood with no effort.

After that, it was off to the table saw and taper jig to cut the second tapers.  Here you can see how I'd cut a taper on each side, then I'd straight rip a leg off each side and then repeat the process.  Done twice, this yields four legs.


Then I went to work on the apron.  I'm installing a flush-fit drawer in the apron for magazines and such.  The challenge here is to get a really smooth interface between the drawer face and the apron.  Here's the trick:
Make two long rips along the top and bottom of where you want the drawer, then cut the sides of the drawer face from the middle piece.

Then glue all the outside piece back together:

Then plane away the sqeezed-out glue and you're left with a seamless piece:
Where'd the cuts go?  Plus the future drawer face is a perfectly snug fit.
No, the drawer face isn't sitting on top of the big board, it's protruding through it.  Told you it was a good fit.

Dovetailin' Time!
These are the two long faces of the apron.  I'm going with half-blind dovetails on the apron because I'm plowing grooves along the inside for the tabletop cleats.  Half-blind dovetails can hide some of the interior workings of furniture a little better than full dovetails.

Half-blind sockets can be particularly difficult because there are lots of acute angles within them that are difficult to clean out.  Fortunately I've been on a chisel-acquiring kick recently and picked up this little baby:
It's a small Lie-Nielsen fishtail chisel.  Its strange shape allows it to really get into tight corners well.

I then plowed a groove around the interior of the apron.  This groove is where the brackets mount that hold the apron and legs to the tabletop.  If I mounted the tabletop directly to the apron, wood movement could distort the table and possibly rip it apart.  I don't want that.  Here's the groove in the pin board:

 Here's the groove in the tail board:

And here's everything together.  Notice how the grooves are contained within the half-blind dovetail...they wouldn't be in the basic full dovetail.

I also plowed grooves along the inside bottom of the long apron boards, these are for mounting drawer runners later.

Now for a drawer.  I've had an oddball piece of wood floating around for a while.  It came in a grab bag of offcuts from a local lumber dealer.  After planing it down a little I'm pretty certain it is reclaimed long-leaf pine.  It's actually quite dense and the grain is remarkably tight and straight.  It was the nicest planing wood I've ever worked.
Yep, it's reclaimed stuff...old nail holes and all:

As I said, I've been on a chisel kick recently.  I just a got a tiny little 1/8" japanese dovetail chisel...I'm glad I did too because nothing else I've got could have cleaned out these tails:

Here's some questionable planning:  I wanted the ambrosia streaks running across the drawerface/apron interface to blend it all together.  Unfortunately this means that there is going to be weak wood at critical places...and wormholes where I wish there weren't:

I took this next picture mainly because I needed to step back from the work and breathe.  I mean, stuff can always be glued back together, but blowing through a joint sucks, no matter how good a repair job works in the end.

It all worked out...this was probably the nicest joint I've ever made:

However things were even worse on the other side.

It all worked out fine in the end with no disaster and no glue patch jobs.  I then resawed some of the bargain bin walnut and made a drawer bottom out of it.  That pretty much completed the drawer:
Notice how the grain runs side to side in the drawer.  This is to force expansion and contraction of the bottom fore and aft, not side to side.  This should reduce the chance that the drawer will jam as the weather changes.

Here's my drawer guidance setup: 
Two runner support the side edges of the drawer and those walnut side pieces keep the drawer sliding straight.

Here's the drawer installed with two kickers along the sides to keep the drawer from dumping down when opened:

It seems to work pretty well, even without being glued up:

So that covers making the legs, apron, and drawer.  Next time I'll fit the legs to the apron and make the tabletop...should be fun.