FedEx...oh my, what could it be?
Looks like someone got a new saw kit, holdfast, and making knife...
Everything here was made in the US...even the cheap little knife. Apparently the Zona people took over the X-acto facility when X-acto left for China.
I was a little surprised here. This package wasn't supposed to arrive until tomorrow. Then again, it was FedEx. Had they used USPS I'm sure the package would've already been through Hartsfield-Jackson twice and currently be en route to Nome, Alaska via dog sled.
So as I said, I had lots of free time and then completely lost it once the saw kit arrived. Typically the handle on this style saw is made out of fruitwood or some such dense species. I don't have any of that nonsense lying around, nor do I feel like spending more money. As such, I was left with two options: mahogany or maple. I like maple a lot, you can really almost do anything with it and it isn't too expensive. On the other hand, this saw has a fair amount of brass on it and in my opinion you can't beat brass and mahogany together.
Mahogany it was...
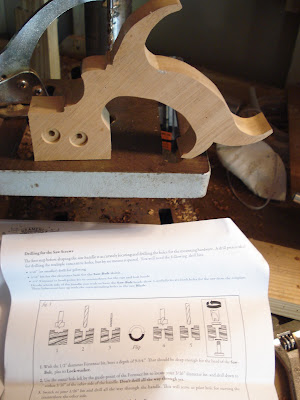
Well, maybe. It ain't exactly the toughest wood out there. I used the same template/router bit method that I tried with the ebony tote earlier this week and things were going fine--you can see from the picture that I was about 90% done with the blank--when something caught the bit wrong and the blank just snapped right then and there. Damnit.
I decided to give mahogany one more try, only this time I used the scroll saw for the whole thing--again, just like I ended up doing with the tote. I've come to the conclusion that the template bit should only be used for simple patterns with lots of straight lines when the wood is close to an inch thick. Thinner stuff is no problem.
Next I drilled the two holes that connect the blade to the handle. I included the drilling sequence in the photo:
1/2" Forstner, 3/16", 1/16", flip, Forstner, 3/16". Very easily done on the drill press.
Next came the part that I was half anticipating, half dreading: setting the blade in the spine. This is the part I've mentioned previously and included that video of the Gramercy guy beating the blade with a modified cricket bat. I just went straight at it.
Start the blade by hand:
Then beat it in a little bit at a time:
No sweat.
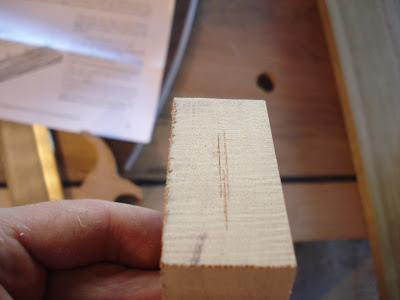
Then I had to carve out the notch and spline for the now brass-backed saw to sit in the handle. The first step is to mark a nice centerline running around the area I'm going to work on. Here's an easy way to establish a quick centerline:
I set my marking gauge reasonably close to what I think looks like the center and then etch a line. Then I flip the piece over and etch another line. In the above picture, these are the two upper outside lines. After I have these two line established, it's easy to set the gauge exactly in the middle of the two lines; this would be the centerline. No tedious measuring needed. After this I cut the spline into which the actual blade will fit:
I know, I said the workbench would be the dozuki's last project...I was wrong.
The dozuki was actually perfect for this task because the kerf of the saw is just about equal to the width of the Gramercy blade.
Then I had to remove material so that the brass spine would fit in the handle:
The instructions called for an 11/64" bit for this. Who has one of those lying around? Had to make it work with a 5/32" and a chisel. The blue masking tape on the bit is my depth gauge. That reminds me of a funny video I saw yesterday:
It took a lot of trimming and tuning, but finally the blade fit perfectly:
You can see the caps of those nice brass bolts. Their respective nuts required a split nut driver to tighten them. Fortunately these are very similar to chainring bolts on bicycles and I just happened to have the appropriate wrench for the job. Actually I had two of them which was good because a little bench grinder time was needed to adapt it for the job.
A little rasping, a little filework, a little sandpaper, a little satin wax...
Cute little bugger, ain't it? Now, maybe I'm just used to dull saws, but this thing was quick! If you want to you can bury it in two strong strokes. Blink and you miss it. I'm still getting used to cutting on the push stroke but I don't think it will take too much getting used to.
Kinda makes me want the bigger one too. They come as a kit as well...how long 'til Christmas?


No comments:
Post a Comment