I've really lost my flair for clever blog titles haven't I?
This past weekend I got to work on the coffee table. Here's the SketchUp concept:
Legs were the first order of business. The two inside faces of each leg taper to half their upper dimension. My approach was to shape the first taper on all of them at once, and then do the second taper one at a time.
The first step was to cut the blank. This piece of oak was wide enough to provide all four legs, with some left over for the kerf needed to separate them:
Then I laid out one taper:
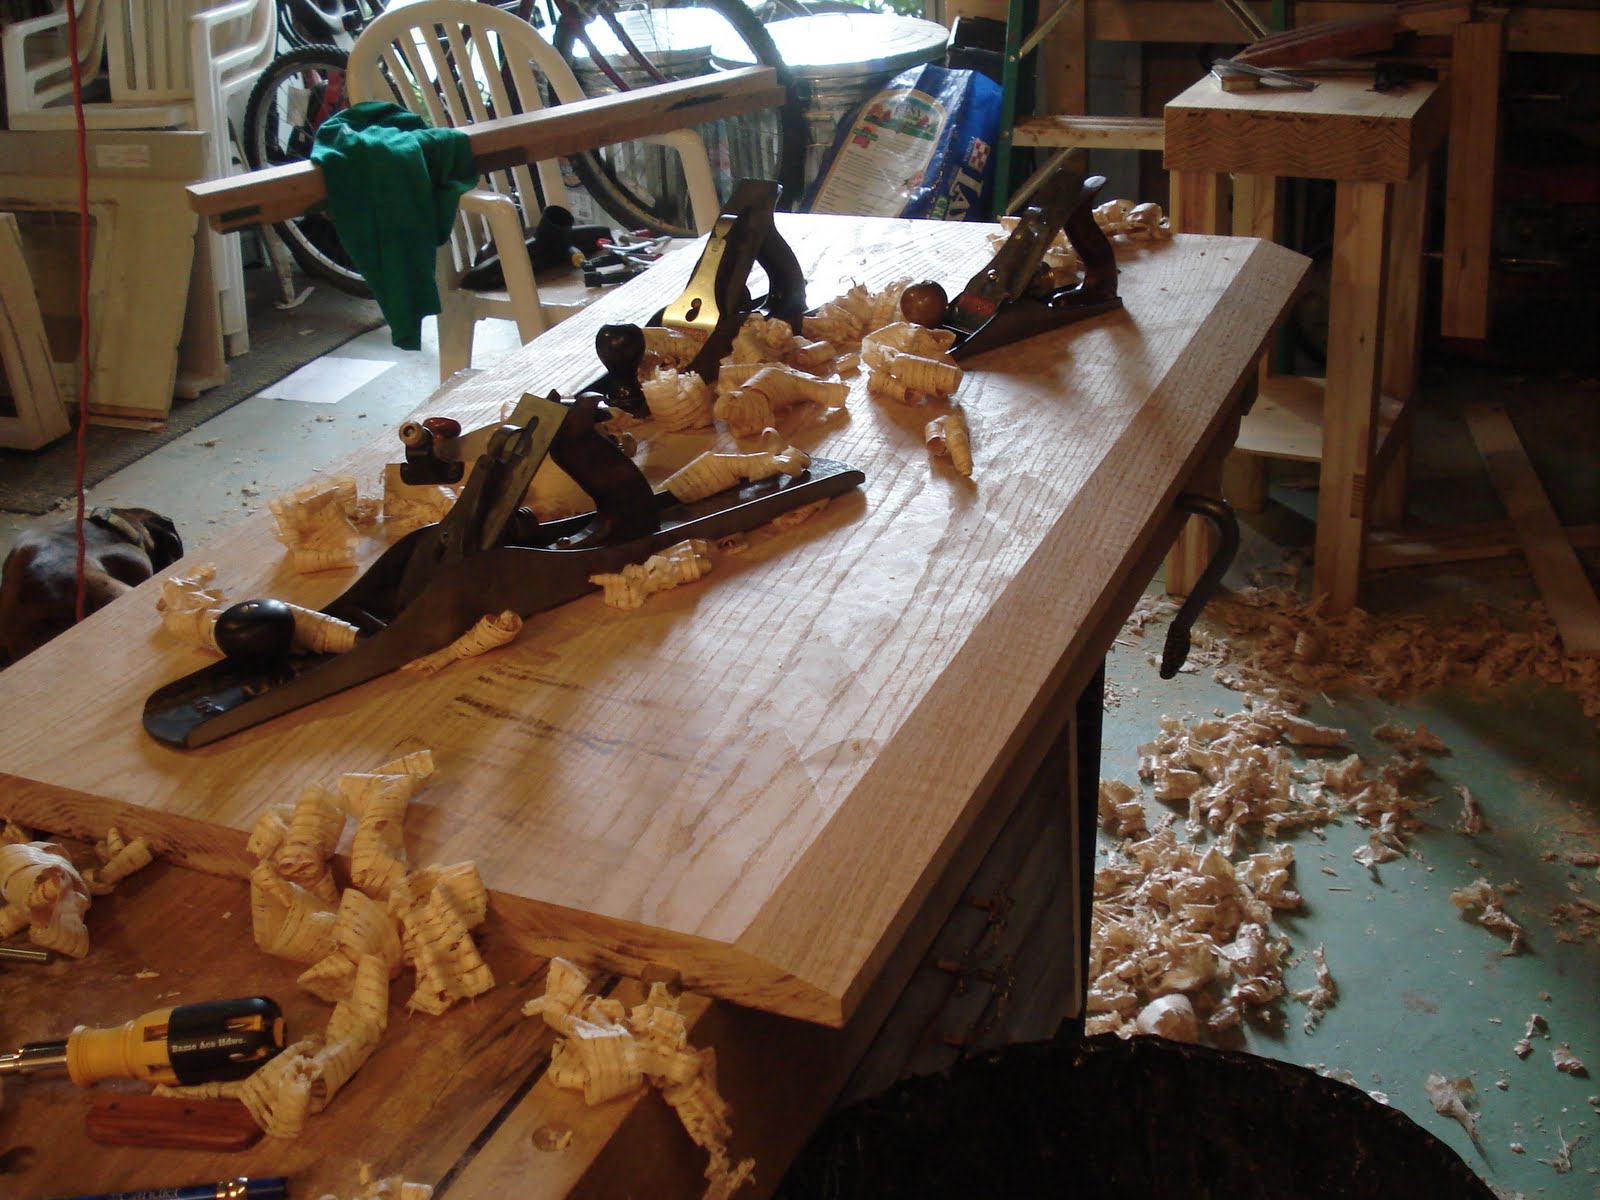
Next I started bringing the taper down with my scrub plane. This plane gets worked across the grain and removes a lot of stock fast:
I just kept working it down, checking my progress often:
Then just cleaned it up with the joiner down to the final taper:
Gotta love planing "downhill," it leaves such a nice polished finish on the wood with no effort.
After that, it was off to the table saw and taper jig to cut the second tapers. Here you can see how I'd cut a taper on each side, then I'd straight rip a leg off each side and then repeat the process. Done twice, this yields four legs.
Then I went to work on the apron. I'm installing a flush-fit drawer in the apron for magazines and such. The challenge here is to get a really smooth interface between the drawer face and the apron. Here's the trick:
Make two long rips along the top and bottom of where you want the drawer, then cut the sides of the drawer face from the middle piece.
Then glue all the outside piece back together:
Then plane away the sqeezed-out glue and you're left with a seamless piece:
Where'd the cuts go? Plus the future drawer face is a perfectly snug fit.
No, the drawer face isn't sitting on top of the big board, it's protruding through it. Told you it was a good fit.
Dovetailin' Time!
These are the two long faces of the apron. I'm going with half-blind dovetails on the apron because I'm plowing grooves along the inside for the tabletop cleats. Half-blind dovetails can hide some of the interior workings of furniture a little better than full dovetails.
Half-blind sockets can be particularly difficult because there are lots of acute angles within them that are difficult to clean out. Fortunately I've been on a chisel-acquiring kick recently and picked up this little baby:
It's a small Lie-Nielsen fishtail chisel. Its strange shape allows it to really get into tight corners well.
I then plowed a groove around the interior of the apron. This groove is where the brackets mount that hold the apron and legs to the tabletop. If I mounted the tabletop directly to the apron, wood movement could distort the table and possibly rip it apart. I don't want that. Here's the groove in the pin board:
Here's the groove in the tail board:
And here's everything together. Notice how the grooves are contained within the half-blind dovetail...they wouldn't be in the basic full dovetail.
I also plowed grooves along the inside bottom of the long apron boards, these are for mounting drawer runners later.
Now for a drawer. I've had an oddball piece of wood floating around for a while. It came in a grab bag of offcuts from a local lumber dealer. After planing it down a little I'm pretty certain it is reclaimed long-leaf pine. It's actually quite dense and the grain is remarkably tight and straight. It was the nicest planing wood I've ever worked.
Yep, it's reclaimed stuff...old nail holes and all:
As I said, I've been on a chisel kick recently. I just a got a tiny little 1/8" japanese dovetail chisel...I'm glad I did too because nothing else I've got could have cleaned out these tails:
Here's some questionable planning: I wanted the ambrosia streaks running across the drawerface/apron interface to blend it all together. Unfortunately this means that there is going to be weak wood at critical places...and wormholes where I wish there weren't:
I took this next picture mainly because I needed to step back from the work and breathe. I mean, stuff can always be glued back together, but blowing through a joint sucks, no matter how good a repair job works in the end.
It all worked out...this was probably the nicest joint I've ever made:
However things were even worse on the other side.
It all worked out fine in the end with no disaster and no glue patch jobs. I then resawed some of the bargain bin walnut and made a drawer bottom out of it. That pretty much completed the drawer:
Notice how the grain runs side to side in the drawer. This is to force expansion and contraction of the bottom fore and aft, not side to side. This should reduce the chance that the drawer will jam as the weather changes.
Here's my drawer guidance setup:
Two runner support the side edges of the drawer and those walnut side pieces keep the drawer sliding straight.
Here's the drawer installed with two kickers along the sides to keep the drawer from dumping down when opened:
It seems to work pretty well, even without being glued up:
So that covers making the legs, apron, and drawer. Next time I'll fit the legs to the apron and make the tabletop...should be fun.


