Monday, October 25, 2010

An Upgrade, a Fix, a Rant, and a PSA

In my very first post of substance--if any could be called that--I talked about making some drawers out of reclaimed firewood. I then put those drawers aside and went to town on the workbench. The other day I made a simple three-sided frame for them, screwed and glued some slides into place and mounted it underneath the bench.

 I think the pulls complement the rustic look of the wood.
So now I have a convenient place where I can keep my hand tools close by.

I've mentioned before how I've been a little disappointed with the face vise. There has always been a little too much play in the guide rails to keep it nice and rigid when exerting force. I measured the diameter of the guide rail and they came out at a little bit under 1/2" wide. I had some 1/2" copper pipe left over from another project so I decided to make some bushings.
The bushings significantly reduce the amount of play in the guide rails, although not quite as much as I had hoped. I had hoped that their inner diameter would actually be a little small so that I would have to press-fit them onto the rails. They weren't, but that's alright; things are much better now.

I really like Irwin Quick Grip bar clamps. They are quick, easy, and typically suit my needs very well. I broke one recently--which ordinarily wouldn't be much of an endorsement--but I have to say that it broke because it was so strong.  I forgot it was holding two pieces together when I was lifting a heavy object and the object actually started pivoting on the clamp. The clamp did not let go of the piece, instead the jaw sheared right off.

So that's what got me looking at new ones down at Home Depot the other day. Now, as much as I love the clamps, Irwin's pricing strategy is an absolute mystery to me. Here's my collection representing much of their product line:
The Irwins are the blue ones. From left to right: 2x standard 6" clamps, 5x mini 6" clamps, 2x mini 12" clamps, 6x hand clamps, 2x spring clamps, and then 2x micro clamps.

So the hand clamps and the spring clamps are reasonably priced, but explain this to me: one of the tiny micro clamps costs more than one of the 6" mini clamps. A pair of 6" mini clamps costs $18 while a pair of 12" mini clamps cost $30, despite the only difference being a small amount more bar stock. These are weird peculiarities, but once you look at combo deals things get ridiculous. Example: you can get a 6" mini clamp for $13 or get four of them for $20. As I said, you can get a pair of 12" mini clamps for $30 or for $25 you can get that same pair plus a pair of 6" mini clamps plus a pair of hand clamps plus a pair of spring clamps. I think that combo deal is a Home Depot exclusive from Irwin, but it's not a temporary sale price...it's always available. I'm not complaining here--I bought that crazy combo afterall--but it just makes no sense to me.

And finally a Public Service Announcement: anyone who has worked a project with me knows how much I detest Phillips head screws. They are a tidal wave of profanity waiting to happen. People don't realize that they are actually designed to slip (or "cam out" as it's known) and once they slip, you know they're going to strip.

Phillips screws were designed back when a lot of manufacturing was becoming automated and manufacturers needed screws that would tighten to a specific torque but no more. That's when Phillips came in: the big assembly line machines could easily tighten lots of screws and cam out at a specific torque instead of overtightening. These days these machines have torque sensors or preset clutches that accomplish this...and yet the Phillips head is the design we Americans see the most. I'm told that Germans generally use torx/star fasteners--I can verify that my wife's VW does--and that Canadians generally use Robertson drive (square). I'm a big fan of both of these and try to spread the good word as much as possible. They really both have two advantages: you can apply lots of torque without fear of stripping them, and the screw stays on the driver much better so you don't need two hands to install them.

This is probably old news to many out there, but what I really wanted to share is something that I don't think many people realize: a lot of Phillips head screws out there are made to accommodate Robertson drive as well and enjoy the same benefits:

Most folks would probably attack this screw with a Phillips driver. However, look closely at the pattern and notice how it's also meant to accept a #2 Robertson as well. The corners of the cross are lopped off and square driver fits perfectly in there.
Yep, stays on there really well...even with this sizable screw. No, I'm not using a magnetized bit. Pretty sweet. I would also bet that with this configuration you could screw/unscrew 10 times the number of times without stripping it. I've even been able to use Robertson bits on screws that were totally stripped 100% Phillips screws. The square bit just works better.

So do yourself a favor, buy good screws. I like Spax and Kreg.

Sunday, October 17, 2010

Look! It's a Bird...It's a Plane...Yep, it's a Plane

Will plane jokes ever get old?

The one essential hand tool that I don't have is a shoulder plane. These are precision planes meant for trimming up corners where two faces meet. The iron (blade) extends all the way over and sits flush with both sides of the tool. They are a must have for executing consistently good joinery and up until now I've just been making do.

There are a number of options out there for these guys: you can buy a nice Lie-NielsenVeritas, or Clifton brand new and spend $200-$300. Used ones on eBay don't go for much less. You can also generally find one or two Records on eBay at anytime but a good one will still be around $150. There are also tons of antique wooden ones on eBay, but you never know what you are really going to get there and they'll still run you around $60. Of course one can always go for a nice Sauer & Steiner too, but the price can be a little discouraging to say the least.

I also saw that you can buy a kit--such as the one from Hock--and build your own. Still flying high from the saw kit success, this was a pretty exciting option for me. Still, the kit was $100. That's some real money.

In the Western tradition, the plane is sort of viewed as the Swiss watch of tools: something extremely complex with many subtleties...something to be attempted only by people who really know what they are doing. In the Japanese tradition the plane is just a jig that holds a blade; the blade is where the craftsmanship comes in.

So, to counterbalance my move to Western saws, I'm adopting the Japanese mindset of planes--well, kind of: mine is still a push plane of the Western variety--but I'm not going to get bogged down by all the mysticism of it:

"...just eyeball it and hold your breath..."

So first I need wood and an iron:
Check. I bought a Clifton 410 iron from Highland yesterday with my 25% off coupon. It was still around $23 but that's not too painful. I also still have that mun ebony from the inlay project; I guess I'll be getting a little less money back now if I return it.

Pick an angle:
Uhh, sure: that looks good. Seriously, that was my method.

I then took the wood to the bandsaw and sliced it into three pieces. Remember, the finished product needs to be the exact same width as the cutting edge of the iron. Fortunately the stock was significantly thicker so I had some room for error here. My main concern was making sure that the middle of the three pieces wasn't thinner than the thin part of the iron. If you are not following what I'm saying don't worry about it, you'll see soon.

I then took the middle piece of ebony, cut it to the predetermined angle, and glued it to another length of ebony which will serve as the bed of the plane. This felt like laying the keel of a boat. The picture here also shows the front section of infill being glued up with the iron bed but I actually abandoned this approach.

After the glue dried I cut the bed away and lapped the whole surface flat so that the iron sat on it nicely.
Now you can see why the infill has to be wider than the narrowest part of the iron: otherwise the iron won't fit once the sides are glued on.

Then I drilled out the mouth of the plane on the side pieces with a Forstner bit and glued them to the infill:

Then I glued the front infill in place and clamped it up:

Then I bandsawed out some areas so that the non-business end of the iron would seat properly. Coming along nicely, ain't it?

Then I examined where the rod for the wedge needed to go, drilled a pilot hole, drilled a Forstner hole, and then glued an oak dowel into place:

Next I cut a wedge to hold the iron in place and started sanding:
And sanding and sanding and sanding. The sides were well proud of the iron so a lot of stock needed to be removed. I took a fair amount down with the smoothing plane but then got nervous and went back to the paper. Let's just say a made a lot of black dust today.

Lookin' good with nice chamfered edges:

I added some Danish oil--yeah, I know...I need to get it inside the plane too. This shot shows how the iron is inserted:
It goes in sideways underneath the dowel and then you twist it flat once the cutter is in the mouth.

I call him Moby:


Some notes:
-With the iron bevel-up, the effective angle of the blade is pretty high. It still works pretty well but it might be a little better bevel-down...I'll see tomorrow.

-I also trimmed the sole of the wedge to be slightly concave. This means that the wedge exerts all it's force only on the back of the iron and on the very tip: where you want it...I'm pleased with myself for this.

-The ergonomics of the piece could probably use a little work. Expect some experimentation in the future.

Thanks for reading.

Saturday, October 16, 2010

Field Trip!

I'm from a pretty rural area and certainly enjoy a lot about that lifestyle. There are, however, quite a few perks to living in a metropolitan part of the world. One that's unique to Atlanta is having Highland Woodworking right around the corner. I'm not a well-traveled man, but Highland has got to be one of the premier shops in the country. There is stuff there that you just can't get anywhere else in the US. Lining the walls of the store are photos of just about every note-worthy woodworker from the past 30 years or so who has come to demonstrate or teach a class at Highland.

Today was their Fall Tent Sale and despite the lack of any actual tents for sale they did have quite a few good deals for tools going on. This is reason enough for a visit on a crisp Fall Saturday morning, but throw Roy Underhill into the mix and it's a can't-miss-occasion. He was there with his treadle lathe and drawhorse demonstrating traditional drawknifing and woodturning.

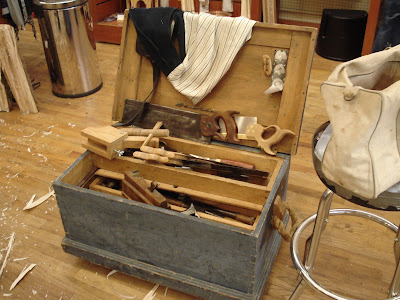
I also got a shot of his tool chest:
If you click on the picture to enlarge it you can see that it is the "deluxe" edition. Hilarious. $10 says that came off a refrigerator.

Highland also got Roy to demonstrate the SawStop table saw. SawStops are pretty cool. Electrical current runs through the blade and it can detect if it hits any skin. Upon detecting skin a mechanism nearly instantly withdraws the blade. Here's the video I shot from the balcony:


Here's a better clip from the Highland folks:


My two favorite lines from the clip:

"It detects when you yell..."
"This is the chicken-safiest saw I have ever seen."

It's no secret the Roy generally eschews power tools--with steam-power as a possible exception--so it was a little funny to see him as the huckster for the most high-tech saw out there. I suppose he adopts the accent and the character to enhance this juxtaposition and sort of say, "Yeah...I don't personally endorse this."

I'm sure Roy does dozens of these appearances each year and I'm sure that the experience for him gets pretty repetitive: a lot of old white guys with beards telling him about their latest projects. I'll say this though: you'd never know it. His enthusiasm for the craft was redlining the whole time I was there. I can't imagine a better ambassador for traditional woodworking.


Thank you, Highland and thank you, Roy. It was a lot of fun.

See him in action here.

Here's a post script question: can anyone name someone who has bled more often on TV than Roy? I'm talking actually bleeding, not theater blood, and were're talking # of occasions, not quantity of blood.

Thursday, October 14, 2010

I had it, then I lost it...

...free time, that is. This afternoon was supposed to be empty. My Thursday class finishes at 1:30, I have no Friday classes, and this weekend is Fall Break so my next class isn't until Wednesday. I was even considering actually cleaning up the garage...that's how much time I was suppose to have. Then the doorbell rang...

FedEx...oh my, what could it be?


Looks like someone got a new saw kit, holdfast, and making knife...

Everything here was made in the US...even the cheap little knife. Apparently the Zona people took over the X-acto facility when X-acto left for China.

I was a little surprised here. This package wasn't supposed to arrive until tomorrow. Then again, it was FedEx. Had they used USPS I'm sure the package would've already been through Hartsfield-Jackson twice and currently be en route to Nome, Alaska via dog sled.

So as I said, I had lots of free time and then completely lost it once the saw kit arrived. Typically the handle on this style saw is made out of fruitwood or some such dense species. I don't have any of that nonsense lying around, nor do I feel like spending more money. As such, I was left with two options: mahogany or maple. I like maple a lot, you can really almost do anything with it and it isn't too expensive. On the other hand, this saw has a fair amount of brass on it and in my opinion you can't beat brass and mahogany together.

Mahogany it was...


Well, maybe. It ain't exactly the toughest wood out there. I used the same template/router bit method that I tried with the ebony tote earlier this week and things were going fine--you can see from the picture that I was about 90% done with the blank--when something caught the bit wrong and the blank just snapped right then and there. Damnit.

I decided to give mahogany one more try, only this time I used the scroll saw for the whole thing--again, just like I ended up doing with the tote. I've come to the conclusion that the template bit should only be used for simple patterns with lots of straight lines when the wood is close to an inch thick. Thinner stuff is no problem.

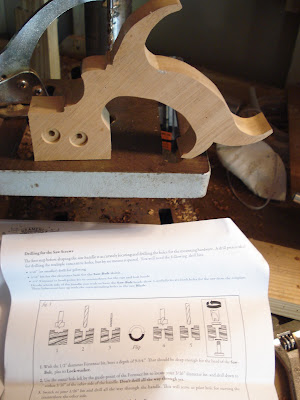
Next I drilled the two holes that connect the blade to the handle. I included the drilling sequence in the photo:

1/2" Forstner, 3/16", 1/16", flip, Forstner, 3/16". Very easily done on the drill press.

Next came the part that I was half anticipating, half dreading: setting the blade in the spine. This is the part I've mentioned previously and included that video of the Gramercy guy beating the blade with a modified cricket bat. I just went straight at it.

Start the blade by hand:

 Then beat it in a little bit at a time:
No sweat.

Then I had to carve out the notch and spline for the now brass-backed saw to sit in the handle. The first step is to mark a nice centerline running around the area I'm going to work on. Here's an easy way to establish a quick centerline:
I set my marking gauge reasonably close to what I think looks like the center and then etch a line. Then I flip the piece over and etch another line. In the above picture, these are the two upper outside lines. After I have these two line established, it's easy to set the gauge exactly in the middle of the two lines; this would be the centerline. No tedious measuring needed. After this I cut the spline into which the actual blade will fit:
I know, I said the workbench would be the dozuki's last project...I was wrong.

The dozuki was actually perfect for this task because the kerf of the saw is just about equal to the width of the Gramercy blade.

Then I had to remove material so that the brass spine would fit in the handle:
The instructions called for an 11/64" bit for this. Who has one of those lying around? Had to make it work with a 5/32" and a chisel. The blue masking tape on the bit is my depth gauge. That reminds me of a funny video I saw yesterday:


It took a lot of trimming and tuning, but finally the blade fit perfectly:
You can see the caps of those nice brass bolts. Their respective nuts required a split nut driver to tighten them. Fortunately these are very similar to chainring bolts on bicycles and I just happened to have the appropriate wrench for the job. Actually I had two of them which was good because a little bench grinder time was needed to adapt it for the job.

A little rasping, a little filework, a little sandpaper, a little satin wax...
Cute little bugger, ain't it? Now, maybe I'm just used to dull saws, but this thing was quick! If you want to you can bury it in two strong strokes. Blink and you miss it. I'm still getting used to cutting on the push stroke but I don't think it will take too much getting used to.

Kinda makes me want the bigger one too. They come as a kit as well...how long 'til Christmas?

Tuesday, October 12, 2010

Risk-->Reward?...Ramblings

Occasionally I come across a discussion of a particular way of viewing craftsmanship. Essentially the model places any craftwork along a spectrum with "workmanship of risk" at one end and "workmanship of certainty" at the other. Basically where your work sits on the spectrum is a function of how likely you are to screw up the whole job at any moment. The late David Pye is credited with developing this model.

Here's an example of workmanship of certainty:
With a CNC, everything is set up before the workpiece is ever at risk. Really, the craft is completed before the bit ever touches the aluminum.

If you want to see you workmanship of risk, head on over to Konrad Sauer's site and take the time to study some of the posts where he walks you through the steps of turning wood and steel into $10,000 handplanes. Lathes? CNCs? Mills? Nope...pretty much just a hacksaw, rasps and files.

Yesterday while I was boring that hole all the way through my new tote I was remembering a picture from Konrad's site:
This was a jig he made for drilling the holes for the cap lever pin on a freaky badger plane. The nature of the plane is such that the angle of this hole is not normal to any axis of the plane body. I suppose the trig calculations aren't that difficult, but I'm pretty sure that he hadn't actually defined any of the angles contributing to it...trying to measure them with any degree of certainty would be futile because any measurement errors would be magnified by the other two angles. That's why I really like his caption for the above photo: 

"In the end I pretty much eyeballed it, took a deep breath, and went for it."

True, if he screws up here, he's only ruined an assemblage of metal. However, at this point he'd probably already spent 40 hours or so on the plane and one wrong move erases a whole week of his working life. He's got kids and a mortgage too, no wonder his stuff is so expensive. I don't do nearly as complicated work as this and I still manage to screw up EVERY SINGLE PROJECT I attempt in some way. Everything I do is filled with mistakes.

But sometimes dowel holes do line up correctly. Sometime pins and tails mate satisfyingly snugly. Occasionally I can even cut a tenon whose sides are parallel and whose shoulders are all on the same plane--not often, but occasionally.

Perhaps this is all a long way around examining the title of this blog. Most folks probably view woodworking--particularly handtooling--as a pretty tame, relaxing hobby. "Adventure" may not exactly be the first word that comes to mind. I can, however, assure you that there are moments of true exhilaration to be had from these high-risk situations.

I would encourage all to examine daily tasks and place them on the risk/certainty scale.

Baking cookies? I like them soft but not so much that I have to wash my hands afterwards. How much time in the oven it too much time?

Trimming fingernails? I like them really short, but don't want them tender.

Etc, etc.

Hopefully my saw kit will come in this week so we can get back to the normal posts instead of this nonsense.

Monday, October 11, 2010

No Rest for the Weary

Well, I'm about ready to call the workbench done. I counterbored a hole for the good luck coin into one of the mortise wedges and banged it home. I used a Virginia quarter: but of course.

Onward to the next project. I mentioned making a replacement tote for my jointer plane earlier out of the ebony. I've never done anything like this before; fortunately cameras were rolling:

The first thing was to glue the template down to some plywood. I use plywood because it's a little more isotropic than solid wood and therefore it's easier to cut along a line that goes in different directions.

Then off to the scroll saw. I think the scroll saw will be the first power tool any future kids use. It's pretty safe--as far as power tools go--and really simple. I originally bought it for cutting wooden gears and was knocking good ones out the same night. The tote template is even easier.

Then I roughly traced the template onto the ebony, and cut out the rough blank on the bandsaw. I then attached the template on the blank with tape and push pins.

I then set up my router table with a flush trim bit. On this photo you can see how the bearing follows the template pattern and guides the carbide cutters. This trims the ebony into the exact shape as the template...
...at least in theory. I've used this method for a lot of things with no problem, but I've never used it with ebony. The wood is so hard that a couple of times the piece kicked-back and nearly flew out of my hands, despite really light cuts and slow feed rate. This was pretty scary so I abandoned it and just went back to the scroll saw and used the template as a guide. Tah-dah!:


Then I used the marking gauge to mark the middle of the blank for hole-drilling purposes:

I then drilled the holes through which the bolts would go. I didn't photo-document this well because it was mentally and physically intensive and I was more concerned with not screwing it up. It all worked out with a little tuning at the end. Here's my drill press set up with the blank removed:
The table is set at 27 deg. for the hole angle and the block of wood keeps the blank straight upright.

It turns out that the template model didn't exactly fit my particular plane. Apparently there were variations throughout time. My plane couldn't accommodate the height of the template model so I had to trim the height a little bit. I was sad about this because I really wanted that big fin at the top.

Then I hit the whole thing with a round-over bit:

Then some rasping, filing, and sanding...

...rub a little oil on it and you have a tote.
Hmm, the picture didn't turn out quite as well as I hoped. Click on it to make it big.

Not bad for a first go, eh? It's a little chunky and not quite as graceful as the original but it fits my hand a lot better. I don't have huge hands but that original was so narrow it really dug into me. Plus this one has racing stripes. If only I had a lathe I'd make a matching knob. *sigh*

Similar post to come: I went ahead and pulled the trigger on the Gramercy saw kit. I've alway wondered how the blade is installed into the brass spine:
Now I know. It doesn't look like a big deal but frankly I was horrified the first time I saw this video. Those are the teeth he's banging on there. Apparently this is how it's been done for centuries so who am I to argue?

Sunday, October 10, 2010

Okay, I've got it now...

...a little while ago I was struggling to come up with a good pun involving handplanes and airplanes. I've got it now...

Where do you park your plane when you are not using it?


A Hanger!

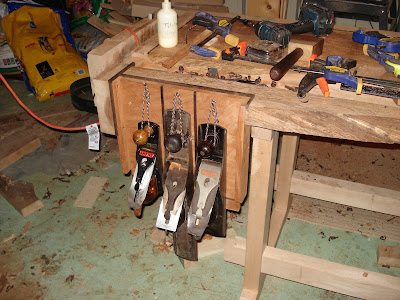
I've almost completed my little onboard benchplane storage unit here. This original section of benchtop was rather rotten so I went ahead and removed it early on. I made this little rack today and it is nearly complete. The glue for the additional inlay around the borders needs to dry and then I'll plane it flush. The inlay separating the planes will remain proud to prevent them from knocking against each other. We'll see how it works out.

I'm surprised I haven't been talking more about tools than I have. I really do enjoying learning as much as I can about all the different implements used in working wood. I think that I've twice mentioned that I'm moving over to Western saws. I went to a large antiques market today hoping to find a brass-backed rip-filed dovetail saw. I was disappointed. I'd been counting on finding one at a good price that needed a little work so that I could practice my sharpening skills but left empty-handed. eBay is questionable for this sort of thing because you can't tell a lot about the subtler points of the condition of the saw from the postings. 

I've had my eye on those new-fangled saws from Lee Valley/Veritas. They are kind of funny looking but I've yet to read a poor review. The price is amazing too: you can get a pair of rip- and crosscut-filed saws for $110. That's less than the cost of one Lie-Nielsen. Experienced folks generally place them in the middle of the pack for top-performing saws and nobody disputes the value. I think it was Christopher Schwarz who called them the Honda Accord of fine saws. 

The saw that seemed to keep being mentioned at the top of these tests was the Gramercy Dovetail saw, made in Brooklyn...how many other products can you name that are actually made in New York City? The downside: $150. That's too much money for me...I'd like to, but I can't. Then I noticed that you can buy a kit and make the saw for about half the price. Not only would this present an opportunity for a good project, I think it would also foster a better sense of ownership of the tool. There's nothing I hate more than products that aren't user-serviceable--this is a big part of why I'm moving away from Japanese saws. Sometimes, however, a lack of serviceability can be self-imposed. For example, were I to spend $150 on the complete Gramercy, there is no way I'm going to take that thing apart and alter it; I'd probably just be too intimidated by it. If I've already paid a huge premium for their assembly expertise, why would I risk screwing it up? 

Any thoughts?

Thursday, October 7, 2010

Payday...

...as in "pay for your mistakes" and "big payoffs."

I made it back to Carlton's before class today to pick up some ebony to correct that glue-up SNAFU discussed earlier. Now, I've dealt with teak before and I thought that was some pretty expensive stuff. If I recall correctly it was somewhere in the neighborhood of $9.00/bd ft. That's pretty high. I've dealt with mahogany as well and that was up there too. I figured I'd get about 1.5 bd ft. of ebony to be on the safe side for this inlay operation and maybe pay $15-20. So as Richard and I were sorting through different pieces--stunning stuff--he looked at me and said, "You know this stuff is $80/bd ft." "Eight?" "No, eighty." "Ooookay then. Got any good substitutes?"

So picture a piece of wood one foot by one foot and an inch thick...that's $80.

He showed me a close relative to the pure black ebony called mun ebony (diospyros mun). It's ink black with thick bands of white running through it and, like black ebony, is as heavy as lead. It's also half the price of the black ebony which still brings it to four times as expensive as the previous most-expensive-wood-I've-bought. Here's The Precious:
Yep, a $60 piece of wood. 

Fortunately I'm allowed to return what I don't use. Isn't woodworking a great little community? Except it takes all your money.

I had a thought as I was driving home: remember my jointer that came with the broken tote that I glued back together? Well, the glued joint isn't exactly seamless and doesn't suit me well. I recalled seeing that Lee Valley has produced free templates for making reproductions of Stanley totes. Interesting business move if you think about it:

Lee Valley: "So instead of buying our stuff, you go out and buy someone else's stuff and then you come to us looking for free help to repair their stuff. Oh, okay...we'll help you out." Does this not reinforce every Canadian stereotype you have, good and bad?

The thought formed: why don't I make my own tote out of ebony with white racing stripes? I think my workbench has a maiden project:

But let's not get ahead of ourselves here...there's a bench to finish. The first step in exotic wood prep is often to scrape the wax off:
They coat the edges of high-dollar hardwoods with wax to prevent moisture from escaping from the sides. But John, don't you want dry wood? Yes, but you want moisture to escape uniformly through the face of a board so that you don't get differential contraction which will put cracks in the piece. I then jointed an edge...
 Expensive shavings

...and cut some strips on the bandsaw:

Then I tapered the bottom of the strips with the blockplane so that they could be wedged into the groove:

Ebony dust is nasty stuff

I think that the effort was worth it:

That was good work for the day but I had some more time on my hands so I took out the router and rounded-over the tool tray edges:

If you look closely at the previous picture you can also see that I have removed the top half of the ends of  the tool tray. I did this so that I can use the workbench to hold sheet goods (plywood) while I cut it with a circular saw. I just line the cut up over the tool tray, set the saw depth to just barely go through the wood, and saw away. I removed those chucks from the ends so that my cuts wouldn't be confined to the length of the workbench. I think it's a slick idea.

I'd been thinking about finishes for a long time and finally settled on boiled linseed oil. Tonight was the night.

Before:


Wait for it...


 After:
Check out how the oil darkens the endgrain and emphasizes those ostrichtails. Pretty sweet. Makes me wanna clap my hands...

Nice chickens there.